
Illustration
Creative Icon Ideas to Make Your Link-in-Bio Stand Out
Read More
/18 May 2026
Do you want to make your app or website designs look alive? Adobe XD is a great tool for this. Many beginners find it hard to add visuals and movement to their designs. This simple guide will show you how to add icons, illustrations, and animations in Adobe XD easily.
Visuals help people use your app without getting confused. By the end of this post, you will know how to use these three elements to make your designs look clean and professional.
Before we start, let us look at what these three tools actually mean in web design.
Icons: These are small, simple symbols. Examples include a magnifying glass for "Search" or a house for "Home." They guide users through your app quickly.
Illustrations: These are larger drawings or pictures. They tell a story, explain a hard idea, or make a screen look beautiful.
Animations: This means movement. It is how a button changes color when you click it, or how a menu slides in from the side of the screen.
Good design is not just about text. Visual elements change how people feel when they use your product. Here is why you need them:
They save space: An icon replaces a whole word, which keeps your design clean.
They explain things faster: The human brain looks at pictures much faster than it reads text.
They make apps fun: Smooth animations make an app feel premium and easy to use.
Icons are the building blocks of any user interface. You can add them to Adobe XD in three easy ways.
Plugins are extra tools inside Adobe XD that do the work for you.
Open Adobe XD and look at the bottom left corner. Click the Plugins icon (it looks like a building block).
Click the + (plus) icon to open the plugin marketplace.
Search for free icon plugins like Icons 4 Design or Font Awesome. Click install.
Open the plugin, type the name of the icon you need (like "User" or "Cart"), and click it. The icon will appear on your screen.
SVG stands for Scalable Vector Graphics. These are special image files that do not get blurry when you make them bigger.
Download free SVG icons from trusted websites like Flaticon or The Noun Project.
Open the folder on your computer where the file is saved.
Click the SVG file and drag it directly onto your Adobe XD artboard.
Use the corners of the box to change its size. Hold the Shift key while resizing to keep the shape perfect.
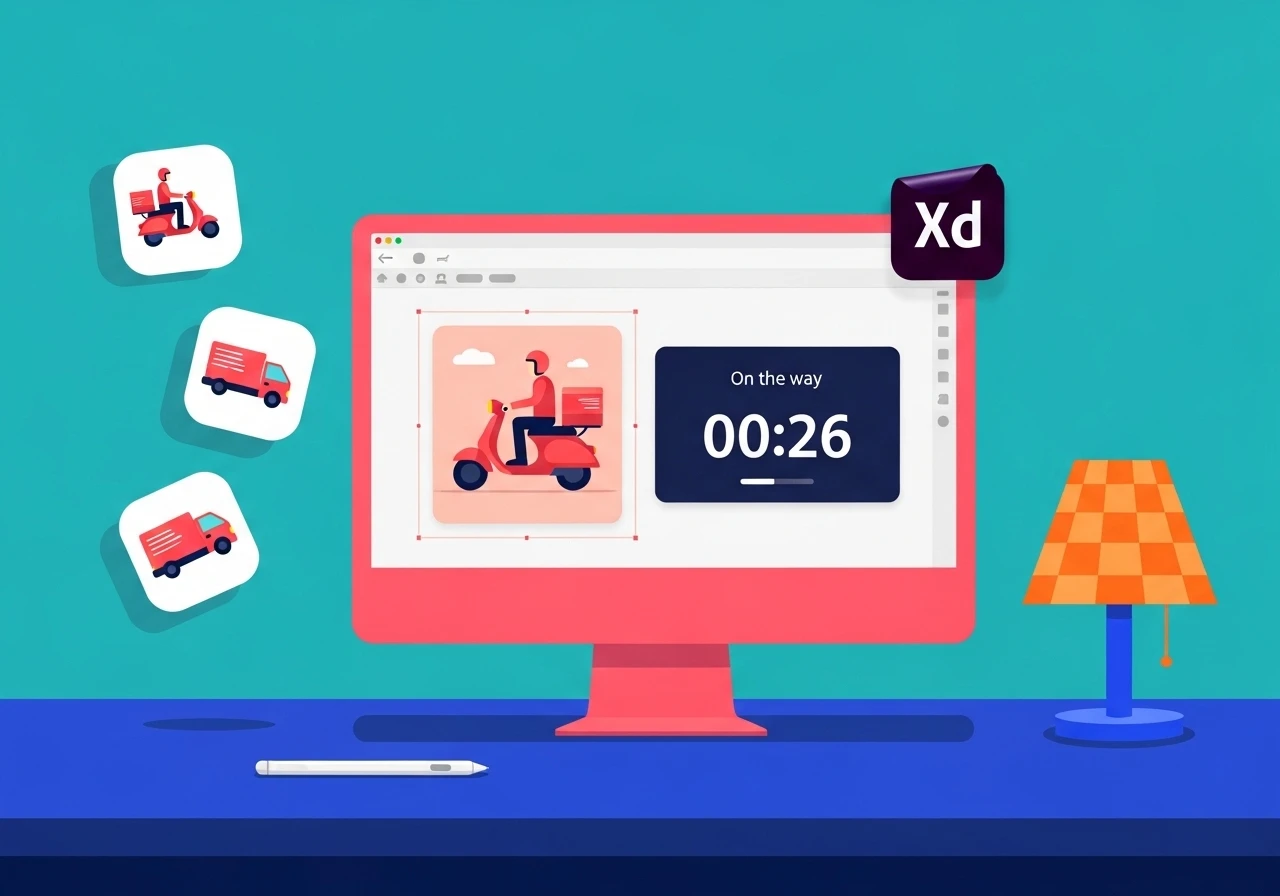
Illustrations add personality to your screens. They work great on welcome screens or empty state pages (like when a shopping cart is empty).
Do not use random photos from the internet because they might have copyright issues. Use free, trusted websites like unDraw or humans. Download your chosen illustration as an SVG file.
In Adobe XD, click File in the top menu.
Click Import.
Choose your downloaded SVG illustration and click Import.
Place the illustration on your artboard.
Since you imported an SVG file, you can change the colors of the drawing to match your brand.
Double-click on the part of the illustration you want to change (like a character's shirt).
Look at the right-side panel and find the Fill section.
Click the color box and pick a new color.
Animation creates a link between two different design screens. Adobe XD uses a powerful feature called Auto-Animate to make this smooth.
Let us create a simple animation where a button moves when you click it.
To make an animation, you need a start screen and an end screen.
Create your first artboard and draw a blue circle on the left side. Label this artboard Screen 1.
Duplicate the artboard by pressing Ctrl + D (Windows) or Cmd + D (Mac). Label the new one Screen 2.
On Screen 2, click the blue circle and move it to the right side. Change its color to green.
Look at the top left corner of Adobe XD. You will see two main tabs: Design and Prototype. Click Prototype.
Click the blue circle on Screen 1. A small blue arrow box will appear on its right side.
Click that blue arrow and drag the line to Screen 2.
Once the line is connected, a settings menu will pop up on the right side of your screen. Choose these options:
Trigger: Tap (This means the animation starts when the user clicks the circle).
Action: Auto-Animate.
Destination: Screen 2.
Easing: Ease In-Out (This makes the movement start slow, go fast, and end slow).
Duration: 0.5s (This means the movement takes half a second).
Click the Play icon in the top right corner of Adobe XD. This opens the preview window. Click your blue circle and watch it slide to the right and turn green!
| Visual Element | Best File Format | Top Tips for Beginners |
| Icons | SVG / Vector | Keep the stroke lines the same thickness across all icons. |
| Illustrations | SVG | Use colors that match your brand palette. |
| Animations | Auto-Animate | Keep movements fast (under 1 second) so users do not get bored waiting. |
Adding icons, illustrations, and animations in Adobe XD is a great way to improve your design skills. Icons help users navigate, illustrations add beauty, and animations make the experience feel real.
Start by practicing with simple shapes and free plugins today. Open Adobe XD, create two artboards, and try the Auto-Animate steps yourself. Happy designing!